Cricut Paper Projects

Sailor Scout Petal Fold Galentines Cards

Sailor Scout Petal Fold Galentines Cards

If there’s something I miss about the Valentine’s Days of childhood, its all the fun paper cards you’d get in a decorated shoebox, plus all the candy of course! So when I was inviting some of my favorite friends to my birthday this year, I used it as a reason to revive the old DIY Valentines vibe by making them all Galentine’s Day Cards, each themed after characters in one of my favorite animes, Sailor Moon!

Read More

DIY Hexagon Paper Tags & Favor Cards

DIY Hexagon Paper Tags & Favor Cards

In any season that flowers are blooming, you better bee-lieve I love some honeycomb themed accents at my parties and events, so when I was designing the favors for my take home gifts for my Vintage Victorian Cocktail Party, I knew I wanted to design some bee themed paperie that I could use for all sorts of future favor fun too! Some simple designing and cardstock cutting later, these Honeycomb Hexagon Favor Tags and Cards were ready to bedeck all my favors while being an adorable and easy project for anyone looking to give away bee themed gifts to their guests!

Read More

Karaoke & Cards Vintage Victorian Party Invitations

Karaoke & Cards Vintage Victorian Party Invitations

To properly announce any ball, you need an impressive invitation! So when I was planning my Victorian themed Karaoke & Cards Cocktail Party, I knew that the invitation to announce it would need to be pretty, informative, and most of all, floral! After a few hours of design, printing, cutting, and assembling, these mismatched floral Vintage Victorian Party Invitations were ready to send out to all my favorite people!

Read More

DIY Patterned Paper Envelope Liners & Invitation Mats

DIY Patterned Paper Envelope Liners & Invitation Mats

For my Vintage Victorian Karaoke & Cards Cocktail Party, mismatched florals were the name of the game! So when I found a bunch of beautiful floral scrapbook paper it became the perfect time to start making more stationery details and create a staple for my future paperie projects. After creating custom Floral Patterned Playing Cards with part of my paper, I picked my favorite prints to turn into a personalized patterned detail on my guests invitations, Patterned Paper Invitation Mat and Envelope Liners.

Read More

Mommy or Daddy Baby Shower Game Cards

Mommy or Daddy Baby Shower Game Cards

Sometimes there’s nothing like a good guessing game to liven up a party and be a fun way to get to know the couple. For my friend’s co-ed Blue Gingham BaByQ Shower, while there was an assortment of games to play, I wanted to include a fun and easy game that everyone could enjoy while keeping that baby theme front and center. So, between our diapered candy bars and mystery baby food jars, I created a Mommy or Daddy guessing game for this party, full of questions about all things baby!

Read More

Baby Food Guessing Game

Baby Food Guessing Game

Baby showers are the perfect time to roll out the unique baby themed games, and my bestie wanted all the classics at her Blue Gingham BaByQ Shower. While my favorite baby shower exclusive game is guessing melted candy bars in diapers, my friend’s favorite from age ten has been this one, the Baby Food Guessing Game!

Read More

Guess the Melted Candy Bar Diaper Baby Shower Game

Guess the Melted Candy Bar Diaper Baby Shower Game

If there’s a party you get to play unique games unlike any other at, it has to be baby showers! This game is certainly one that’s baby shower approved: featuring diapers, candy, game cards, and just a little bit of gross factor for fun, the Candy Bar Guessing Diaper Game!

Read More

DIY Wax Stamp Floral Patterned Playing Cards

DIY Wax Stamp Floral Patterned Playing Cards

While I was creating all sorts of mismatched floral stationery and details for my latest party, I just had to share one of my favorites before the festivities started, featuring some of my own favorite things; florals and beautiful wax stamps! With my next party full of fun and games, my first project featuring all the wax seals I’ve made so far are kicking off with these Personalized Wax Stamp Floral Patterned Playing Cards.

Read More

DIY Diaper Raffle Baby Shower Station

DIY Diaper Raffle Baby Shower Station

For a baby shower where the baby is all stocked up on the regular baby gear, a Diaper Raffle is the perfect way for guests to contribute to the new baby in a very useful way, getting them all the diapers, wipes, and baby consumables they seem to take up so quickly! For my friend’s recent Unicorn Baby Sprinkle, her welcoming their second child was the perfect opportunity to make a diaper raffle of my own, as well as share what I learned and designed with all of you!

Read More

DIY Heart Wine Glass Place Cards

This post contains affiliate links, meaning that if you click on a link I will recieve a small comission. This costs you nothing extra and I only promote products I use and love! You can read our full disclosure here

DIY Heart Wine Glass Placecards #svgfiles #cricutprojects #placecards

What better way to adorn your wine glasses in this lovely Valentine’s Season! I’m on a heart kick right now, probably due to really wanting to have a Galentine’s Brunch. :) For Galentine’s Day, Valentines Day, or any Wedding Celebration; these place cards are a cute and fun way to give your guests a glass and their table information.

DIY Heart Wine Glass Placecards #svgfiles #cricutprojects #placecards

I’ve made a couple place cards before but I want to try some Wine Glass Place cards again, but this time cutting them so they could sit on the edge of the glass. I started with a simple heart place cards that can easily be handwritten with your guest information. These ones are super simple, literally cut out, slight fold, and ready to go! :)

DIY Heart Wine Glass Placecards #svgfiles #cricutprojects #placecards

Supplies:
White Cardstock
Craft Cutter and Tool Set
Adhesive Mat
Heart Place Card Design File

DIY Heart Wine Glass Placecards #svgfiles #cricutprojects #placecards

1. After downloading the cut files, import them into the Cricut Software. After creating a new project, select Upload Image. Select the file you wish to upload and it will automatically take you to the final upload screen, where you can name the file the select Save.  Copy and Paste the design for as many placecards as you want (1 standard sheet of paper will fit 6 hearts).

2. Cut the design(s) in your choice of card stock with the Light Card stock Setting on your Cricut. The SVG Files are sized so that they will automatically cut to the size you see in the photos, but if you want to change the size you can. :) Load the Cricut with card stock (portrait orientation) and cut the designs.

Note: You’ll notice that I used a standard mat for this project, but I would recommend the Light Grip Mats for Paper Products. This just happens to be one of my older mats that’s not quite so sticky anymore :)

DIY Heart Wine Glass Placecards #svgfiles #cricutprojects #placecards

3. Remove the card stock from the outer edge, leaving the hearts on the cutting mat.

DIY Heart Wine Glass Placecards #svgfiles #cricutprojects #placecards

4. Peel off each place card from the edge of the design, leaving the extra paper on the cutting mat. Repeat with all hearts, then remove and discard all the card stock left on the cutting mat.

DIY Heart Wine Glass Placecards #svgfiles #cricutprojects #placecards

5. Using your finger, create a bend horizontally on the card, not folding the card but pressing it with your fingers into a curved shape. This will make it easier to sit nicely on the glass.

DIY Heart Wine Glass Placecards #svgfiles #cricutprojects #placecards

6. Place on the glass with the cut out “tab” side of the heart on the inside of the glass. Once your guest information has been written, they can be stored until you are ready to place them on the glasses of your event! :)

DIY Heart Wine Glass Placecards #svgfiles #cricutprojects #placecards


Beers and Bowties Groomsmen Invitations

This post contains affiliate links, meaning that if you click on a link I will recieve a small comission. This costs you nothing extra and I only promote products I use and love! You can read our full disclosure here

Beers and Bowties Groomsman Proposal #willyoubemygroomsman #bestman #groomsman

Is it just me or does it seem like groomsmen get the short end of the stick in the “getting invited” department? Granted, they don’t generally have to put in the same hours as the bridesmaids but they should certainly get a fun invitation too!

Beers and Bowties Groomsman Proposal #willyoubemygroomsman #bestman #groomsman

This idea actually came to me while I was designing my Bridesmaid Wine Labels as I was trying to think of a fun, cheap way to invite the groomsmen with a similar theme. Enter this dashing 6 pack of beers, bow-tying up for the occasion!

There are two parts to this tutorial, making the bowties and covering and labelling the 6 pack holder. I don’t think its necessarily required to cover the 6 pack holder itself, but I did just for fun and a Cricut makes this an easy and quick project for inviting your groomsmen. The best part about the bow ties is that you can pick your pattern so each 6 pack doesn’t have to match, but instead can be themed to each groomsmen. I just used extra scrapbook paper I had and they turned out super cute!

Beers and Bowties Groomsman Proposal #willyoubemygroomsman #bestman #groomsman

Supplies:
6 Pack of Beer
Colored Paper for Bowties
Adhesive Vinyl (I used Black and Gray for the background and White for the Words)
Tape
Transfer Paper
Craft Cutter and Tool Set
Adhesive Mat
Bow Tie Cut File
6 Pack Label Cut File

Covering the Holder:

Beers and Bowties Groomsman Proposal #willyoubemygroomsman #bestman #groomsman

1.     Pick the Background Color for your 6 pack holder. I did mine half gray and half black so that you can see the way it looks with different bowties.

2.     Lay the holder flat onto the back of the vinyl sheet and trace around the top and sides. Cut the Vinyl along those lines with scissors.

Beers and Bowties Groomsman Proposal #willyoubemygroomsman #bestman #groomsman

3.     Peel and Stick the vinyl to the sides of the holder. I made mine a little longer just in case and then trimmed off the excess vinyl when I was done to about ½” above the holder. Once trimmed, I folded the vinyl over the edges of the holder to create a smooth line.

Beers and Bowties Groomsman Proposal #willyoubemygroomsman #bestman #groomsman

4.     Once your holder is covered, import the 6 pack label file into the Cricut Design Software. Measure the height of your holder and resize the image to 1” less than that height (I made mine 5” ).

Beers and Bowties Groomsman Proposal #willyoubemygroomsman #bestman #groomsman

5.     Cut out the design in your chosen color and weed out the excess vinyl. Using Contact Paper, transfer the label to the 6 pack holder.

Beers and Bowties Groomsman Proposal #willyoubemygroomsman #bestman #groomsman

Making Bowties:

1.     Upload the Bow Tie Cut File into the Cricut Design Software.

2.     Cut out bowties with you Cricut craft Cutter. I was able to get 6 bowties per sheet so each piece of paper can be used for one 6 pack. I would highly recommend using the light grip adheasive mat (its purple) so that you don’t have to worry about the paper sticking to your mat too much and ripping when you try to remove them.

Beers and Bowties Groomsman Proposal #willyoubemygroomsman #bestman #groomsman

3.     Remove your bowties from the mat. Using the smaller rectangular piece, fold around the center of the bowtie and tape the two edges together, so that the longer collar piece can be threaded through the center.

4.     Thread the long rectangular collar piece through the loop, with the pretty side of the paper facing towards the back of the bowtie.

Beers and Bowties Groomsman Proposal #willyoubemygroomsman #bestman #groomsman

5.     Wrap the Bowtie around your beer bottle, once you have the bowtie positioned how you want it; tape the ends of the collar together. Repeat for all remaining bowties and bottles.

6.     Once completed, put all the newly bowtied beers back into the holder and its ready to go!

Beers and Bowties Groomsman Proposal #willyoubemygroomsman #bestman #groomsman

As you can see, these are easy and quick to make if you have a craft cutter, just buy your guys their favorite 6 pack, cut, tape, and you’re ready to go! Plus, these boys have to put up with a lot of wedding craziness for the next couple months, never hurts to start it off with a beer. :)

Beers and Bowties Groomsman Proposal #willyoubemygroomsman #bestman #groomsman

DIY Personalized Wedding Matches

This post contains affiliate links, meaning that if you click on a link I will recieve a small comission. This costs you nothing extra and I only promote products I use and love! You can read our full disclosure here

One of my favorite ideas that came into play with our wedding was the Cigar Bar I designed for my husband and his fraternity brothers. It gave the guys a fun "manly" thing to do during the wedding and everyone told us how much they liked it! Now for me, no cigar bar is complete without personalized matches, and no better time to personalize everything than for your wedding! As I searched, I couldn't seem to find anything quite right so I decided to design my own! It was surprisingly easy and I love the way they turned out!

Note: This post contains affiliate links, which means that if you click on one of the product links and choose to purchase, I will receive a small commission. This does not affect your price in any way and I only promote products I use and love! :)

Supplies:


Full Sheet Adhesive labels (I used Avery 5156)

Matches Template

1. Using the matchbook template, start by putting your own information into the text boxes. The font I used for our names and location is called Baroque Script, so if you want it to look exactly like these matches make sure to have the font downloaded beforehand!

2. Print out the matches and cut them out with scissors. Next, line up the top of the matchbook and the sticker. Make sure that the sandpaper strip is on the side that won't be covered by the sticker.

3. As shown above, adhere the sticker starting at the top, then smoothing around the entire matchbook. Below you see a finished matchbook.

flower explosion

This project really added a special touch to our big day and as you can see its quite easy to do! After the initial measuring and designing of the template it only took about two hours to cut and make 100 matchbooks! Stay tuned for more fun wedding crafts!

Valentine's Day Tea Party Invitations

This post contains affiliate links, meaning that if you click on a link I will recieve a small comission. This costs you nothing extra and I only promote products I use and love! You can read our full disclosure here

I'm going to be honest here: the Hubs and I aren't huge Valentine's Day fans. Other than one Greek event we did together before actually dating we've never done anything for Valentine's Day, and with our anniversary now being the end of February, it seems even more pointless (especially when we can take advantage of all the half-priced flowers and candy ). 

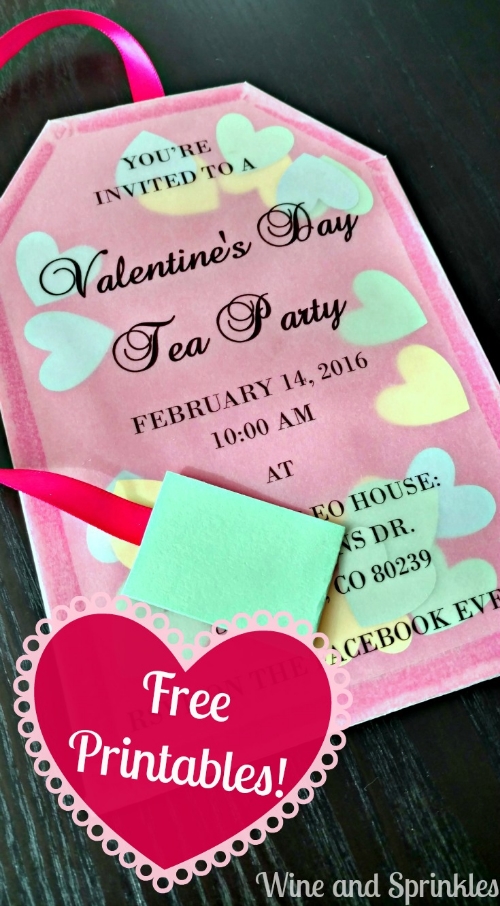
Yes, I'm kind of a Grinch when it comes to Valentine's Day; ever since I could no longer make a box that got filled with candy it's gone down hill. Well this is the year that is going to change! I've always wanted to throw a high tea party so I decided this was the perfect way to get excited about Valentine's day again! And once I got this tea bag invitation in my head I was committed! 

If you have Publisher you will be able to download the file and fill it in with your own information. The bright side of these invites is that they are actually super easy to make and require almost not skills except for cutting along the lines and lining up tape along the edges. I will warn you though, they are time consuming. :)

Note: This post contains affiliate links, which means that if you click one of the links and choose to purchase, I will receive a small commission. This does not affect your price in any way and I only promote products I use and love!

Supplies:
(For 10 invitations)

10 sheets Pastel Pink Vellum
5 sheets Razzleberry Card stock
1 sheet each of light blue, green and yellow card stock for hearts
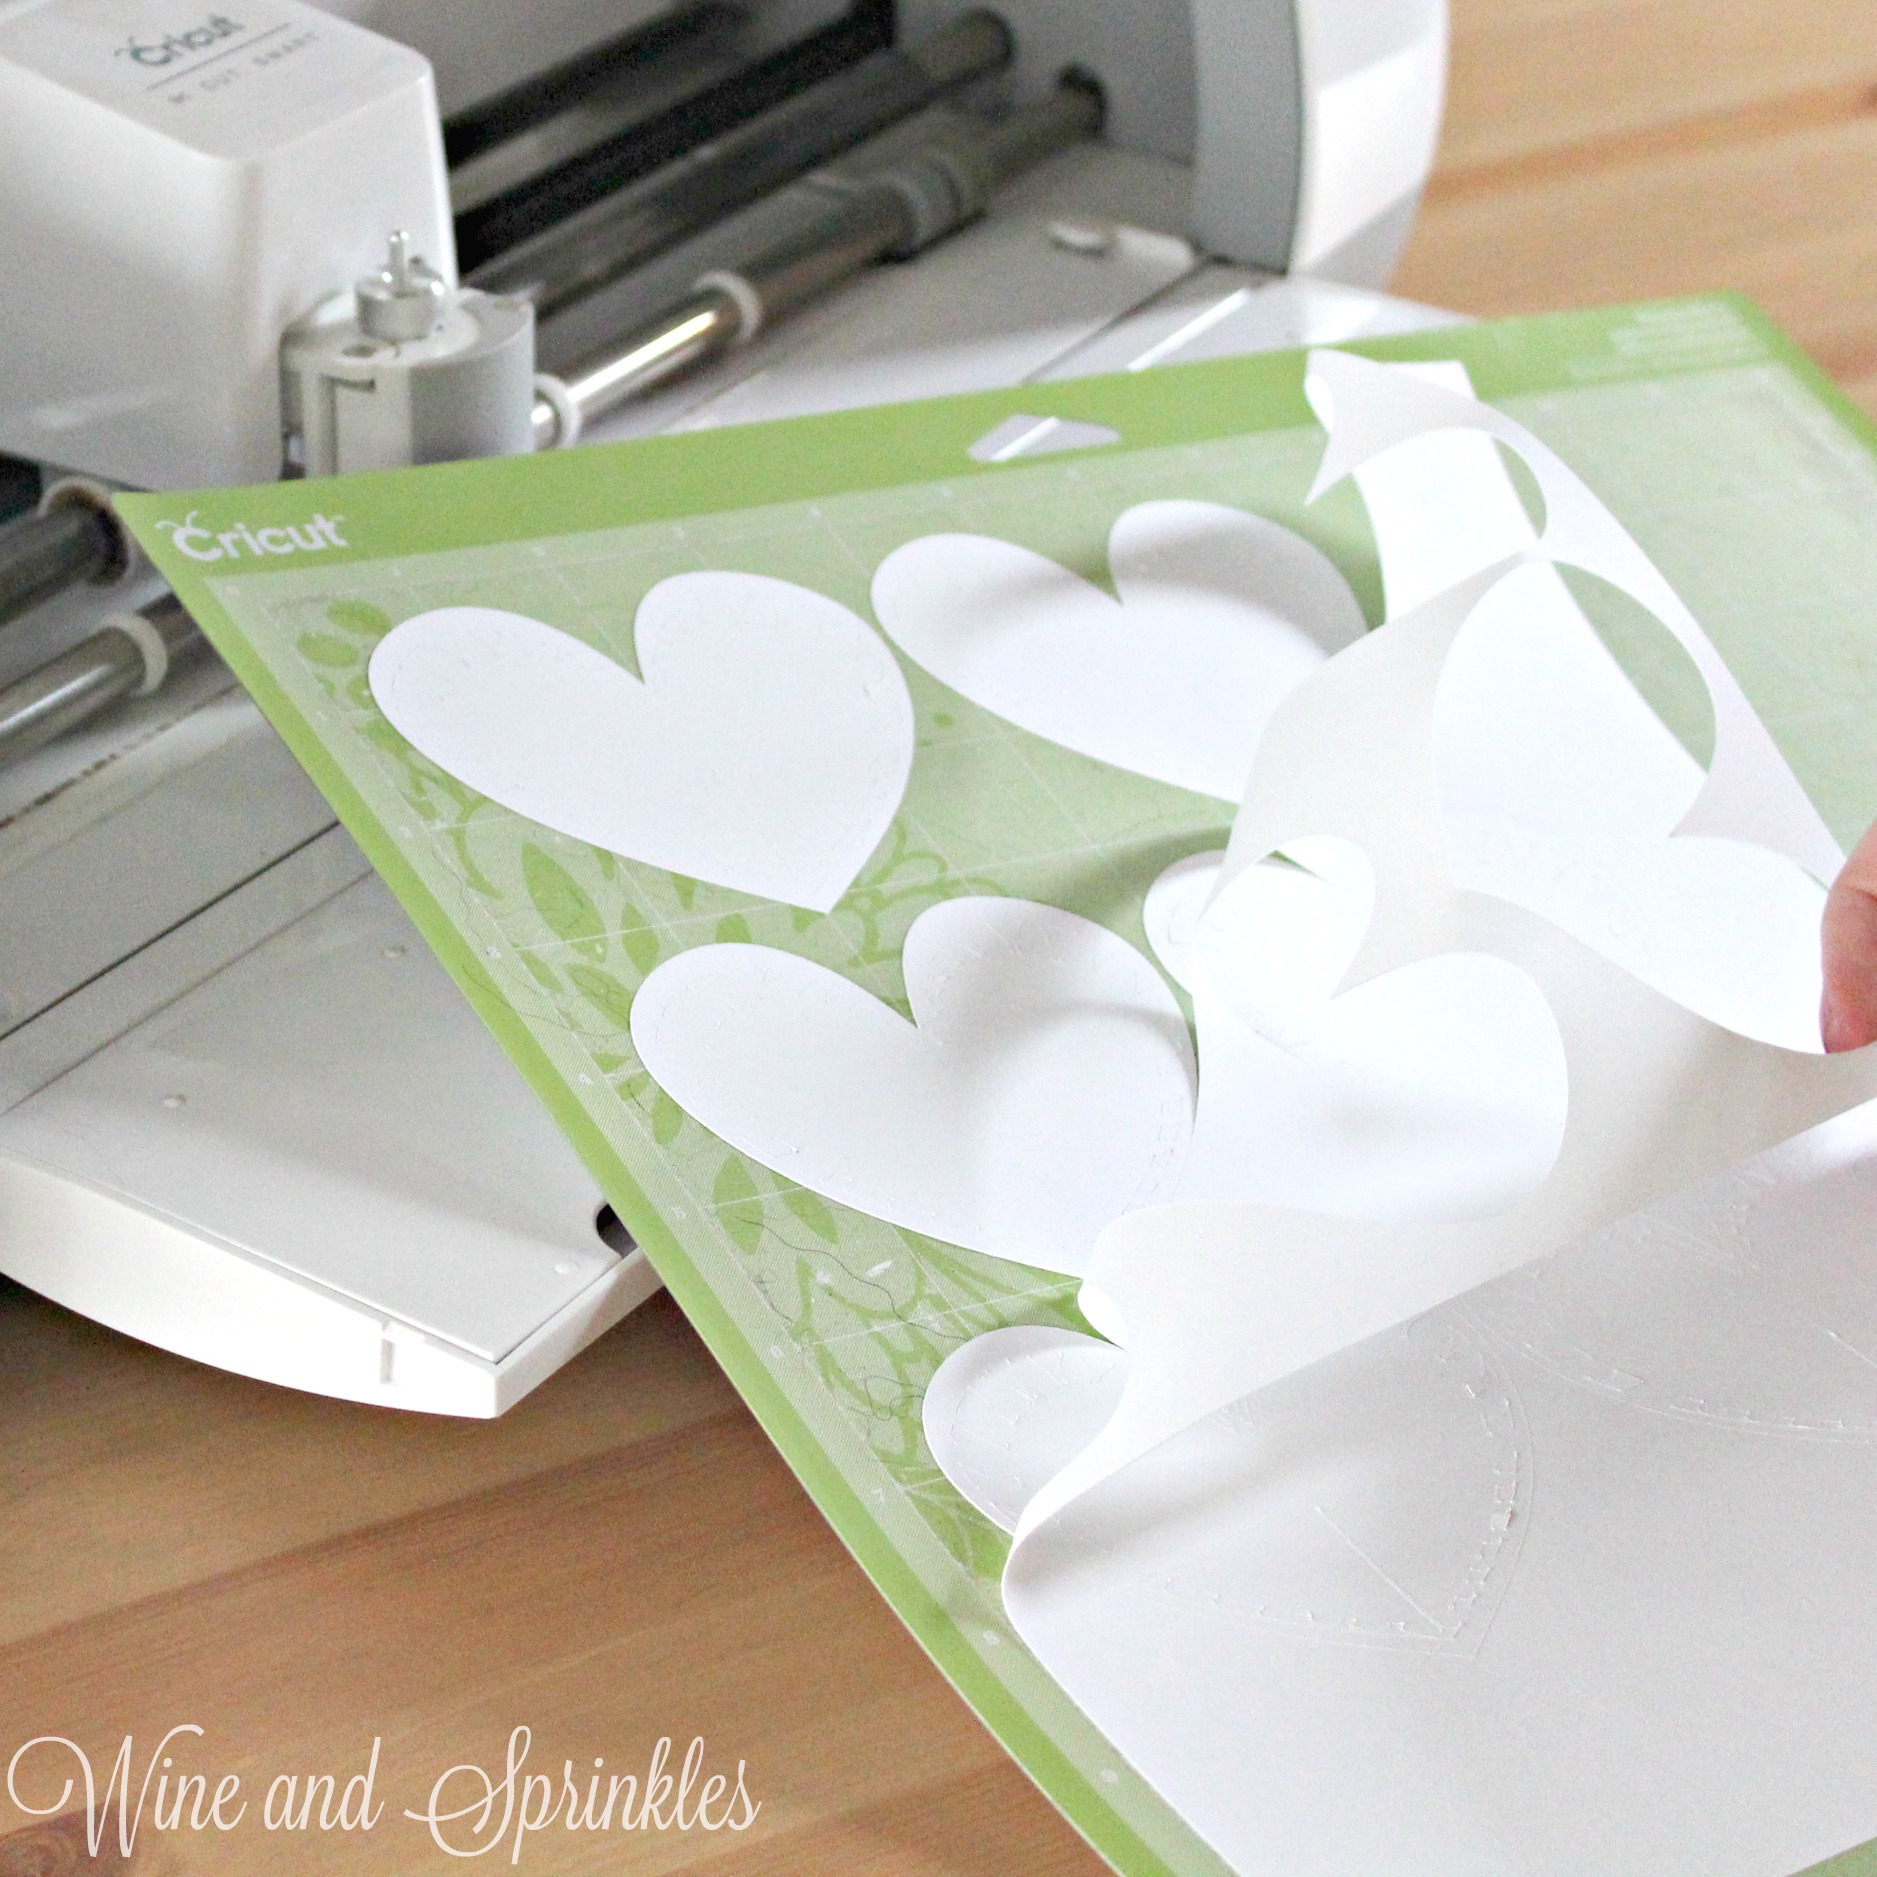
Craft Cutter and Tool Set (for cutting out hearts)
1 sheet pastel green card stock for tag
Pink Ribbon
Double Sided Tape
10 Envelopes

Note: If you do not have an electronic craft cutter, I would highly suggest buying heart shaped confetti as opposed to cutting out hundreds of tiny hearts, I have a lot of crafting patience and that would drive me crazy!

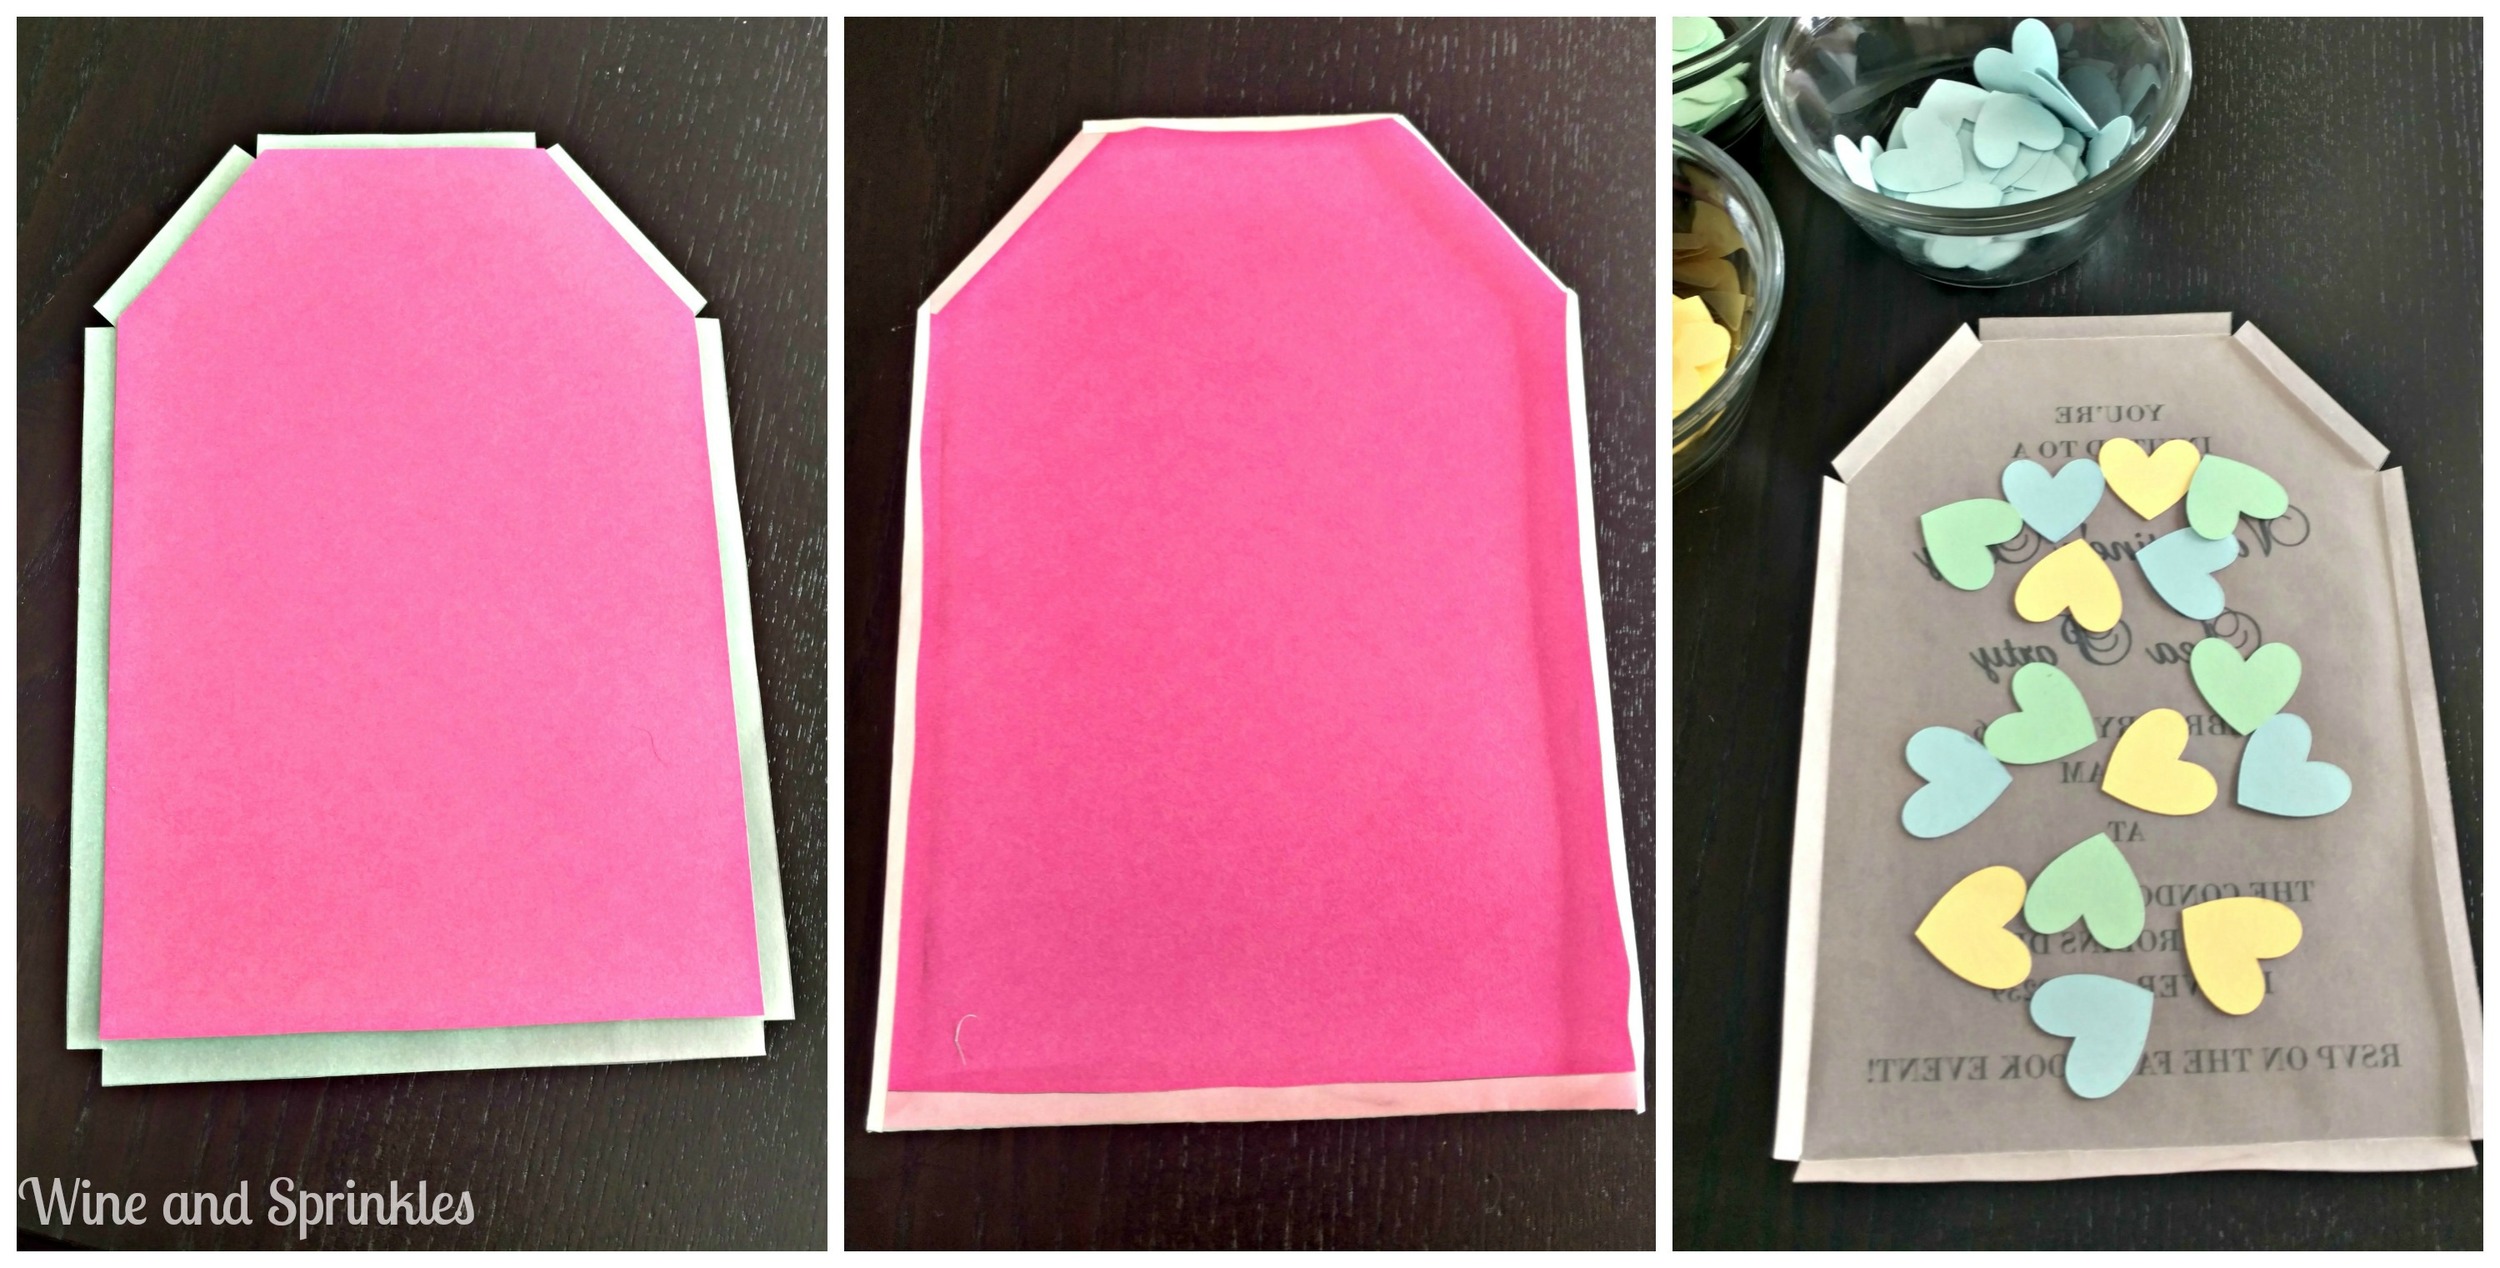
1. First, Download the design file here. the first page you will print on the card stock for bases and the second sheet you will print on the vellum for your words. I always outline my cut lines in light gray so that if you are a less than perfect cutter you get less contrast than with straight black.

2. Cut out all the card stock bases and vellum prints. Using a craft cutter, cut out the candy hearts for inside the invite (mine were aprx. 1 inch square).
 

3. Now lay the base on top of the vellum (vellum wrong side up). Once you have i aligned with the tabs equally spaced, fold up each vellum "tab" to score the paper for when you tape. Remove the card stock, and fill the vellum with hearts (I did 5 of each color).

4. Line each tab of the vellum with double sided tape. The tab should be completely covered, with the tape coming into the card body. My tape happened to take about half its width on the tab and half in the card. now replace the card stock into the vellum, pressing down on each tape to seal in the hearts. Flip over the card and do the same on the front, don't catch any hearts in your tape!

5. Finally, glue on an 8" piece of pink ribbon and seal the loose side with a tag; I used a folded up rectangle of pastel green card stock.

Now the invitation is officially complete! See what I said about time consuming? Since I just made 10 for a smaller gathering it was totally worth the effort, they came out just like I wanted! Make sure to buy bigger envelopes, these cards are on the heftier size so you need around the A9 Size.

Thanks for stopping by and stay tuned for more Valentine's Fun!


Check out the link parties we join here.